

Introduction
Learning how to use a compass is a practical outdoor skill that can help you understand directions, follow a route and navigate when your phone’s GPS is unavailable. Whether you enjoy hiking, camping, walking in the countryside or exploring unfamiliar places, a compass can provide reliable directional information when used correctly.
Although a compass may look complicated at first, its basic functions are easy to learn. You need to understand a few important parts, know how to find north, and practise following a direction before relying on it during an outdoor adventure.
This beginner-friendly guide explains how to use a compass step by step, how to follow a compass bearing, how to work with a map and which common mistakes to avoid.
Quick Answer: How Do You Use a Compass?
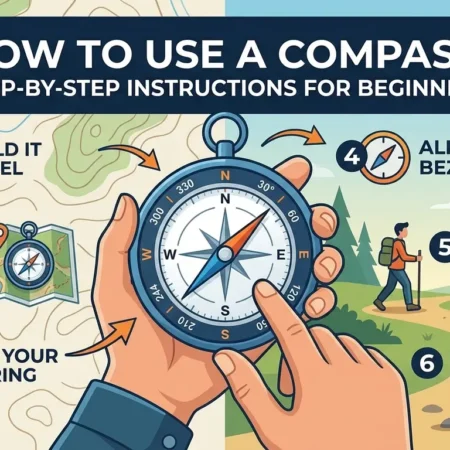
To use a standard magnetic baseplate compass, hold it flat and level in front of you, away from metal objects. Allow the magnetic needle to settle, then rotate your body and compass until the north-seeking end of the needle aligns with the orienting arrow.
This helps you identify the direction you are facing. To travel in a specific direction, set the compass dial to your desired bearing, rotate your body until the needle aligns with the orienting arrow, and follow the direction-of-travel arrow towards a visible landmark.
For reliable navigation, practise with a map, understand local magnetic declination and carry additional navigation and safety equipment when travelling outdoors.
1. What Is a Compass?
A compass is a navigation instrument that helps you determine direction. A traditional magnetic compass contains a magnetised needle that responds to Earth’s magnetic field. When held correctly and away from interference, the needle settles along a north-south direction relative to the local magnetic field.
Compasses are useful because they do not depend on mobile phone reception or batteries. They can complement a paper map and help you maintain a planned direction when landmarks are difficult to identify.
However, a compass does not tell you your exact location by itself. To understand where you are and plan a safe route, you may need a map, visible landmarks and knowledge of the surrounding terrain.
Why should beginners learn to use a compass?
There are several reasons to learn this skill:
- Outdoor navigation: Identify directions while walking or hiking.
- Camping: Understand the layout of a campsite and nearby trails.
- Route planning: Follow a planned bearing towards a landmark.
- Map reading: Relate the directions on a map to the landscape around you.
- Backup navigation: Retain a useful navigation tool when electronic devices run out of power.
A compass is most useful when you practise with it before heading into unfamiliar terrain. Reading instructions is a good start, but hands-on experience builds confidence.
2. Understanding the Parts of a Compass
Before using a compass, become familiar with its main components. A common beginner-friendly option is a magnetic baseplate compass.
Magnetic needle
The magnetic needle rotates to align with Earth’s local magnetic field. One end is usually coloured red to indicate the north-seeking end, although colours and markings can vary by model.
Always check the manufacturer’s instructions rather than assuming every compass uses identical colours.
Compass housing and dial
The rotating housing contains the compass dial, often marked with the four cardinal directions and degree measurements from 0° to 360°.
The dial allows you to select a direction or bearing. On most standard compasses, north is 0° or 360°, east is 90°, south is 180° and west is 270°.
Orienting arrow
The orienting arrow is printed inside the rotating housing. It helps you align the compass dial with the magnetic needle when setting or following a bearing.
A common beginner’s reminder is to place the north-seeking needle end inside the orienting arrow, but always confirm your particular compass’s markings.
Direction-of-travel arrow
This arrow is usually printed on the baseplate. It indicates the direction you should travel after aligning the compass to your chosen bearing.
Do not confuse it with the magnetic needle. The needle responds to Earth’s magnetic field; the travel arrow points towards your intended direction.
Baseplate and index line
The transparent baseplate helps you place the compass on a map and align it with a route. The index line is the reference point used to read the bearing from the dial.
Some models also have a magnifying lens, ruler, declination adjustment or sighting equipment.
3. The Four Main Directions
A compass becomes easier to use once you understand the four cardinal directions.
| Direction | Degree bearing | Meaning |
|---|---|---|
| North | 0° or 360° | The reference direction at the top of a standard compass dial |
| East | 90° | A quarter turn clockwise from north |
| South | 180° | Half a turn from north |
| West | 270° | Three-quarters of a turn clockwise from north |
The degree measurements represent a complete circle of 360 degrees. Directions between the main points can be expressed using additional degree values.
For example, northeast is approximately 45°, southeast is 135°, southwest is 225° and northwest is 315°.
These measurements are called bearings when they describe a direction of travel.
A simple way to remember the directions
Imagine standing in the middle of a clock face. North is at the top, east is on the right, south is at the bottom and west is on the left.
Moving clockwise from north, the bearing increases from 0° through 90°, 180° and 270°, returning to 360°.
Practise identifying these directions before moving on to more advanced navigation.
4. How to Use a Compass Step by Step
The following instructions use a standard magnetic baseplate compass. Other compass types may have different controls or require a slightly different technique.
Step 1: Choose a suitable location
Begin in an open, familiar area such as a garden, park or clear space away from traffic and hazards.
Keep the compass away from objects that may affect its reading. Keys, phones, belt buckles, vehicles, fences and other metal or magnetic sources can interfere with the needle.
Electrical equipment and some electronic devices can also affect readings, depending on their construction and distance from the compass.
Step 2: Hold the compass flat
Place the compass in your palm or on a stable, level surface. If you are holding it, keep it approximately level and steady.
Tilting the compass can prevent the needle from moving freely on some models. Give the needle time to settle before interpreting the reading.
Step 3: Find magnetic north
Look at the magnetic needle and identify its north-seeking end. Rotate your body and the compass together until that end aligns with the north marking on the dial.
On a conventional baseplate compass, the needle’s north-seeking end should align with the orienting arrow when you are facing magnetic north.
You have now identified the magnetic north direction. Remember that magnetic north and geographic north are not always in exactly the same direction.
Step 4: Identify the other directions
Once you have established north, the remaining directions follow naturally.
East is to your right when facing north, south is behind you, and west is to your left.
Try pointing towards each direction while checking the compass. This simple exercise helps you connect the dial’s markings with the real world.
Step 5: Choose a destination
Select a visible landmark in the direction you want to travel. It could be a tree, a trail junction or another recognisable feature in a safe practice area.
For basic directional awareness, you can simply orient the compass and identify the direction of the landmark. If you need to follow a precise route, use a measured bearing instead.
Step 6: Check the direction before moving
Before walking, confirm that the compass is level, the needle is settled and no nearby object is interfering with the reading.
Look up from the compass and check your surroundings. Navigation should involve both the instrument and your understanding of the landscape.
Beginner tip: Practise finding north several times from different positions in the same open area. The process should become familiar before you attempt longer routes.
5. How to Follow a Compass Bearing
A bearing is a direction expressed as an angle, usually measured clockwise from north. Learning to follow a bearing is an important step beyond simply identifying the cardinal directions.
For example, if your destination lies east of you, a standard compass bearing is 90°.
Step 1: Set the bearing
Rotate the compass housing until the desired degree value aligns with the index line. If you are following a route from a map, use the bearing measured from that route and account for magnetic declination where necessary.
Step 2: Hold the compass correctly
Hold the compass level in front of you. Keep the direction-of-travel arrow pointing away from your body.
Avoid placing the compass close to metal objects or equipment that could affect the reading.
Step 3: Turn your body
Rotate your body and compass together until the north-seeking end of the magnetic needle aligns with the orienting arrow.
Keep the selected bearing fixed on the dial while you turn. Do not rotate the housing accidentally as you align yourself.
Step 4: Select a landmark
Look along the direction-of-travel arrow and identify a safe, visible landmark in that direction. A distinctive tree, rock or trail feature can help you maintain your course.
Step 5: Walk towards the landmark
Move towards the chosen landmark while remaining aware of the terrain. Once you reach it, check the compass again and select another landmark along the same bearing.
This method helps you maintain a consistent direction without staring at the compass during every step.
Step 6: Recheck your route
Check your bearing regularly, particularly after passing an obstacle, turning around a bend or travelling through dense vegetation.
If your route requires crossing a stream, steep slope or other hazard, do not follow the bearing blindly. Use a safe route around the obstacle and re-establish your direction afterwards.
6. How to Use a Compass with a Map
A compass becomes significantly more useful when combined with a suitable topographic map. A map shows geographical features and terrain, while a compass helps relate the map’s directions to the landscape.
The following steps describe a basic map-and-compass technique using a baseplate compass.
Step 1: Find your starting point and destination
Identify your current location and your intended destination on the map. Use recognisable features such as trail junctions, rivers, buildings or terrain shapes to confirm your position.
If you cannot identify your location with reasonable confidence, avoid guessing and setting off based on an uncertain point.
Step 2: Draw or imagine a route line
Place a ruler or the straight edge of the compass baseplate between the starting point and destination.
Align the direction-of-travel arrow towards the destination. Ensure that you have not accidentally pointed it towards the starting point.
Step 3: Align the compass with map north
Without shifting the baseplate from the route line, rotate the compass housing until its north-south orienting lines are parallel to the map’s north-south grid lines, with the north end aligned towards map north.
The correct reference depends on the map and compass setup. If the map uses grid north, you must account for the relationship between grid north and magnetic north when transferring the bearing to the ground.
Step 4: Read the bearing
Read the degree value at the index line. This gives you the map bearing under the reference system used by the map and compass.
Before leaving, verify the direction of travel and check whether the bearing needs a magnetic declination correction.
Step 5: Follow the bearing on the ground
Set the corrected bearing on your compass, hold it level and rotate yourself until the magnetic needle aligns with the orienting arrow.
Choose a visible landmark along the direction-of-travel arrow and move towards it. Repeat this process while checking your map and surrounding features.
For a more detailed explanation, read the U.S. Geological Survey’s guide to using a compass with a topographic map.
7. Understanding Magnetic Declination
One important concept for compass users is magnetic declination. This is the angular difference between magnetic north and true north at a particular location.
True north refers to geographic north, while a magnetic compass aligns with Earth’s local magnetic field. The difference varies by location and changes over time.
Why does declination matter?
If you use a compass reading directly with a map that references a different north direction, your route may be off course. The effect becomes more noticeable over longer distances.
Maps may include a diagram showing true north, grid north and magnetic north. Check the legend and date of the map before using its declination information.
How should beginners handle declination?
Start by learning whether your compass has an adjustable declination setting. If it does, follow the manufacturer’s instructions and set it using a current, location-specific value.
If your compass does not have an adjustable setting, you may need to correct the bearing manually. The correct addition or subtraction depends on the bearing’s reference system and the sign convention being used, so follow a reliable map-and-compass guide rather than memorising an isolated rule.
For further details, consult the USGS explanation of magnetic declination and its compass and map navigation instructions.
8. Common Compass Mistakes to Avoid
Beginners can improve their accuracy by learning which errors are most likely to affect a compass reading.
Holding the compass at an angle
A tilted compass may not allow the needle to move freely. Keep it level and steady while taking a reading.
Standing too close to metal
Metal objects and magnetic sources can deflect the needle. Move away from vehicles, fences, tools and other potential sources of interference before checking your direction.
Confusing the needle with the travel arrow
The magnetic needle shows the direction of the local magnetic field. The direction-of-travel arrow shows the route you intend to follow.
Confusing the two can cause you to walk in the wrong direction even when the compass is functioning correctly.
Rotating the dial after setting a bearing
Once you have selected a bearing, keep the dial fixed while you turn your body to align the magnetic needle. Accidentally rotating the housing changes the direction you are trying to follow.
Ignoring magnetic declination
A compass needle does not automatically point to true north. When using a map, check the relationship between the map’s north reference and magnetic north before relying on a bearing.
Walking without checking the surroundings
A compass is a directional tool, not a complete route planner. A straight bearing may lead towards cliffs, water, dense vegetation or other obstacles.
Use a map and your judgement to choose a safe route. Recheck your direction as you travel.
Depending on a compass without practising
Understanding the theory does not guarantee accurate navigation in the field. Practise setting bearings, aligning the needle and reading a map in a familiar area before attempting a challenging journey.
9. Tips for Practising Compass Navigation
Consistent practice makes compass use easier and more reliable. Start with simple activities and increase the difficulty gradually.
Try a direction-finding exercise
Choose a familiar open space and identify north, east, south and west. Point towards each direction, then check your reading.
Repeat the exercise from different positions to understand how turning your body affects the compass.
Practise following short bearings
Select a safe landmark and estimate or set a bearing towards it. Walk to the landmark, check the compass and repeat the exercise with another target.
Use short distances at first. The goal is to develop a reliable routine rather than travel as far as possible.
Learn to orient a map
Choose a suitable map of a familiar area. Identify prominent features, place the compass on the map and practise aligning the map’s north reference with the compass.
Compare the map with the real landscape to strengthen your understanding of direction and terrain.
Keep a navigation record
For practice trips, note the bearings you follow, the landmarks you use and any errors you notice. Reviewing these observations can help you identify recurring mistakes.
Carry backup navigation equipment
For unfamiliar or remote areas, carry a suitable map, a compass, a charged phone or GPS device where appropriate, and the equipment needed for your trip. Tell someone your route and expected return time when the circumstances warrant it.
Do not rely exclusively on electronic navigation, but do not assume a compass alone guarantees safety either.
Final Thoughts
Learning how to use a compass is easier when you break the process into manageable steps. Start by understanding the compass parts, finding magnetic north and recognising the four cardinal directions. Once these basics feel comfortable, practise setting bearings and combining the compass with a map.
Accuracy comes from holding the compass level, avoiding magnetic interference, checking declination where necessary and comparing your readings with the surrounding landscape. Most importantly, never follow a bearing without considering the safety of the route.
With regular practice and proper preparation, a compass can become a valuable part of your outdoor navigation skills.
How do you use a compass for the first time?
Hold the compass flat and level, away from metal objects. Allow the magnetic needle to settle, then turn your body and compass until the north-seeking end aligns with the orienting arrow. Practise identifying north, east, south and west before following a bearing.
Which direction does a compass point?
A standard magnetic compass aligns with Earth’s local magnetic field, and its north-seeking end points towards magnetic north. Magnetic north differs from true north by an angle called magnetic declination.
What do the numbers on a compass mean?
The numbers represent degrees around a circle. North is 0° or 360°, east is 90°, south is 180° and west is 270°. Other values represent directions between these main points.
How do you follow a compass bearing?
Set the desired bearing on the compass dial, hold it level and rotate your body until the north-seeking needle aligns with the orienting arrow. Follow the direction-of-travel arrow towards a safe landmark, then repeat the process as needed.
Can you use a compass without a map?
Yes. A compass can help you identify directions and follow a bearing without a map. However, a map helps you understand your location, the terrain and the route to your destination.

Other Articles




No Comment! Be the first one.